
Converting VoIP to landline requires an Analog Telephone Adapter (ATA) to bridge the digital-analog gap. You'll need to verify your internet connection meets minimum requirements of 100 kbps per line and connect a VoIP-enabled router for peak performance. Start by disconnecting your existing PSTN service, then connect your ATA to both your internet modem and traditional phone using RJ-11 cables. Configure the ATA's PHONE ports according to manufacturer specifications, and test your setup for call quality and connection stability. While the basic conversion process is straightforward, understanding the technical nuances will guarantee a seamless shift to your new phone system.
Understanding VoIP and Landline Basics
In today's digital age, understanding the difference between VoIP and traditional landline systems is vital before attempting any conversion. VoIP advantages include cost-effective communication over the internet, while landline limitations stem from their dependence on physical infrastructure. The transition can lead to 40-80% cost savings compared to traditional phone services.
You'll find that VoIP systems require a high-speed internet connection and specific equipment, such as an adapter or IP phone, to function properly. Analog Telephone Adaptors are commonly used to connect traditional phones to VoIP networks.
When you're considering the switch, call quality becomes a significant factor. While landlines typically provide consistent audio quality, VoIP's performance depends on your internet bandwidth – you'll need at least 1 Mbps upload and download speeds for clear conversations.
As part of your change considerations, you'll want to verify your number porting eligibility with your new provider. The process typically takes 2-4 weeks, during which you should maintain your existing landline service.
Remember that VoIP uses the Session Initiation Protocol (SIP) to manage calls, offering you enhanced features and flexibility that traditional landlines can't match.
However, you'll need to verify your equipment is compatible and properly connected to your internet router for peak performance.
Required Equipment and Tools
To convert your VoIP system to landline, you'll need essential hardware components like an Analog Telephone Adapter (ATA) and modular jacks to establish proper connections. Consider selecting modern IP devices that integrate seamlessly with both VoIP and traditional phone systems.
Your internet connection must meet minimum speed requirements, typically at least 100 Kbps upload and download speeds per line, along with a router that supports Quality of Service (QoS) settings.
You'll want to have phone system testing tools on hand, including a network speed tester and VoIP monitoring software, to guarantee your setup maintains consistent call quality. Base station installation is required to properly convert analog voice data from your existing phones.
Essential Hardware Components
Converting VoIP to landline requires several essential hardware components that work together to bridge digital and analog communications.
You'll need to understand the different ATA types available and VoIP benefits to make the right choice for your setup. Session Initiation Protocol support provides enhanced functionality. The conversion process becomes straightforward when you've got all the necessary equipment properly configured, including various types of VoIP adapters that cater to different communication needs.
Here are the core components you'll need to guarantee a successful conversion:
- Analog Telephone Adapter (ATA) – Choose between single-port or multi-port options based on your needs.
- VoIP-enabled router or adapter to manage your digital communications.
- RJ-11 connectors and modular jacks for physical connections.
- Broadband internet connection with stable speeds.
You'll find that ATAs are particularly valuable for their versatility, allowing you to connect your existing phones to the digital network. Your standard analog phones can continue to function normally once connected through an ATA adapter.
When selecting your components, consider whether you'll need advanced features like call forwarding or voicemail.
Remember to disconnect your PSTN service before installation to protect your equipment.
Internet Connection Requirements
Reliability stands at the forefront of successful VoIP-to-landline conversion, making your internet connection requirements essential for seamless operation.
You'll need a stable connection with at least 100 kb/s of bandwidth per line to prevent VoIP latency issues and guarantee clear communication. While WiFi can work, you'll get better results with a wired Ethernet connection that minimizes interference and packet loss. Power over Ethernet switches can efficiently deliver both data and power through a single cable. The right IP phone or adapter will ensure compatibility with your chosen VoIP service provider. Additionally, implementing VoIP encryption protocols can further protect your communication while utilizing the conversion.
To enhance your setup, you'll want to verify that your internet speed meets the minimum requirements of 1 Mbps for both upload and download.
Consider running a speed test to check your connection's performance, paying special attention to ping times – they should stay under 70 milliseconds for ideal call quality.
For bandwidth enhancement, calculate your needs by multiplying the number of concurrent calls you'll make by 80-100 kbps per call. If you're planning multiple simultaneous conversations, you might need to upgrade your internet plan.
Don't forget to configure Quality of Service (QoS) settings on your router to prioritize VoIP traffic.
This step helps maintain call clarity even when other devices are using the network, ensuring your conversations remain crystal clear.
Phone System Testing Tools
Successful VoIP-to-landline conversion depends heavily on having the right testing tools and equipment at your disposal. To guarantee you're ready for thorough VoIP testing, you'll want to familiarize yourself with essential diagnostic tools that help identify and resolve potential issues before they affect your system's performance.
When setting up your testing arsenal, prioritize these vital components:
- Network analyzers to monitor data packet flow and identify potential bottlenecks.
- VoIP quality test software for measuring jitter, latency, and call quality metrics.
- Analog Telephone Adapters (ATAs) to connect traditional phones to your VoIP network.
- Cable testers and multimeters for verifying physical connections.
You'll find that proper testing equipment makes a significant difference in troubleshooting and maintaining your converted system. The GA11 VoIP adapter is a key piece of equipment that enables seamless conversion. Maintaining stable internet connectivity is crucial since VoIP calls rely on internet to function properly. Additionally, understanding NAT traversal techniques can help optimize your VoIP setup and mitigate possible connectivity issues.
Start with basic tools like a multimeter and tone generator for testing physical connections, then progress to more advanced solutions like SIP analyzers and VoIP stress test tools.
Remember to regularly test call quality using softphone applications and monitor network performance with dedicated tools. This all-encompassing approach guarantees your VoIP-to-landline conversion remains stable and reliable, giving you peace of mind about your communication system.
Preparing Your Phone Circuit
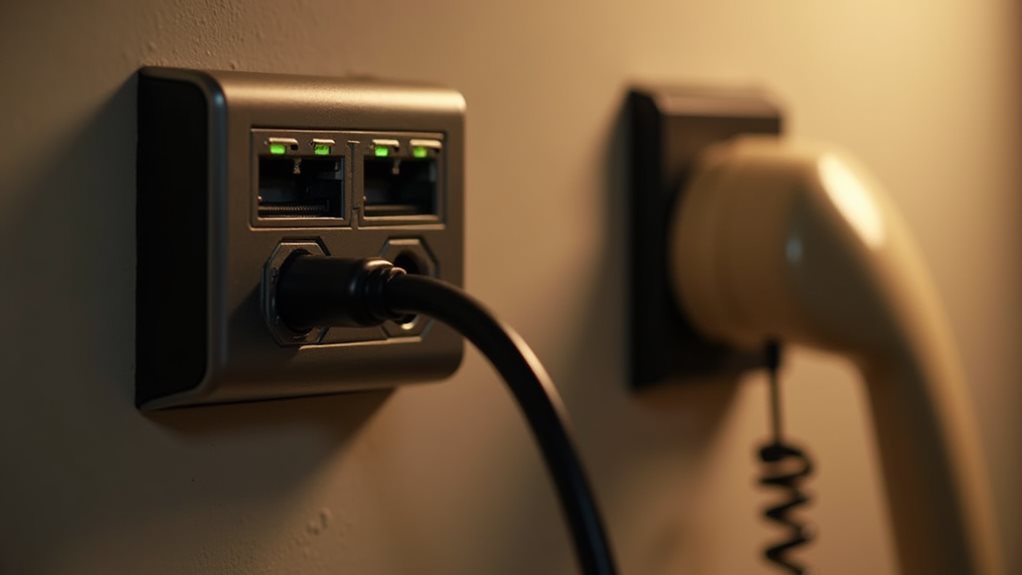
A phone circuit's proper preparation forms the foundation of a successful VoIP-to-landline conversion. When implementing circuit integration strategies, you'll need to start by disconnecting your existing PSTN service to guarantee safety and protect your equipment during the analogue signal conversion process.
Your next step involves identifying and isolating the internal phone circuit. You'll want to locate the modular jack, which is typically a small box where your telephone wires connect. This vital component will serve as your connection point between your existing infrastructure and the new VoIP system.
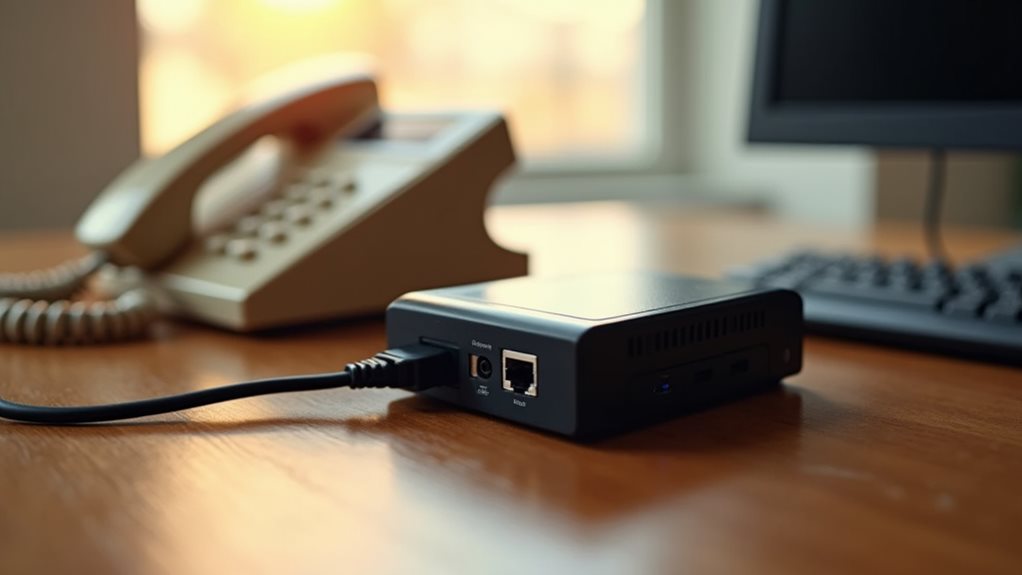
Once you've isolated the circuit, you're ready to connect your ATA using an RJ-11 connector. This device will bridge your traditional phone system with the digital world of VoIP, enabling seamless communication through your existing phones.
Additionally, ensure your ATA is configured correctly to enable seamless integration of VoIP technology with traditional systems.
Before finalizing the conversion, you'll need to verify everything's working correctly. Make a test call and check for any quality issues like jitter or packet loss.
If you encounter problems, you might need to adjust your network settings to optimize performance. This testing phase guarantees you'll have reliable communication once the system's fully operational.
Setting Up Your ATA
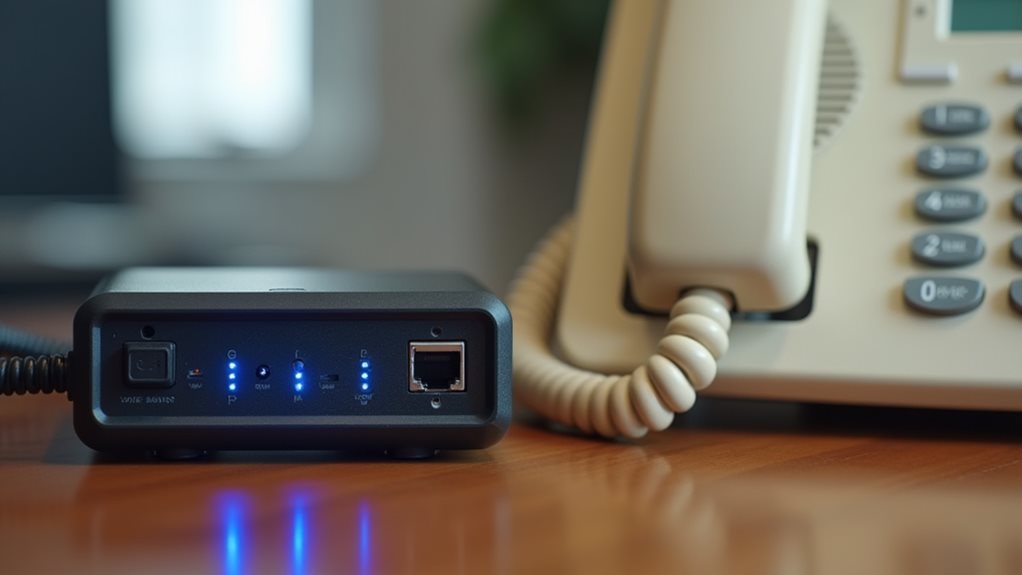
You'll need to connect your ATA to both a power source and your router's ethernet port to establish the necessary internet connectivity.
Once powered up, locate the phone ports (usually labeled "Phone 1" and "Phone 2") on your ATA and use RJ11 cables to link them to your internal phone circuit.
After making these physical connections, you'll want to check for a dial tone on your phones to confirm that the initial setup is working properly. Additionally, ensure you have a stable internet connection for optimal performance, as this is crucial for clear and stable call quality using your VoIP phone service.
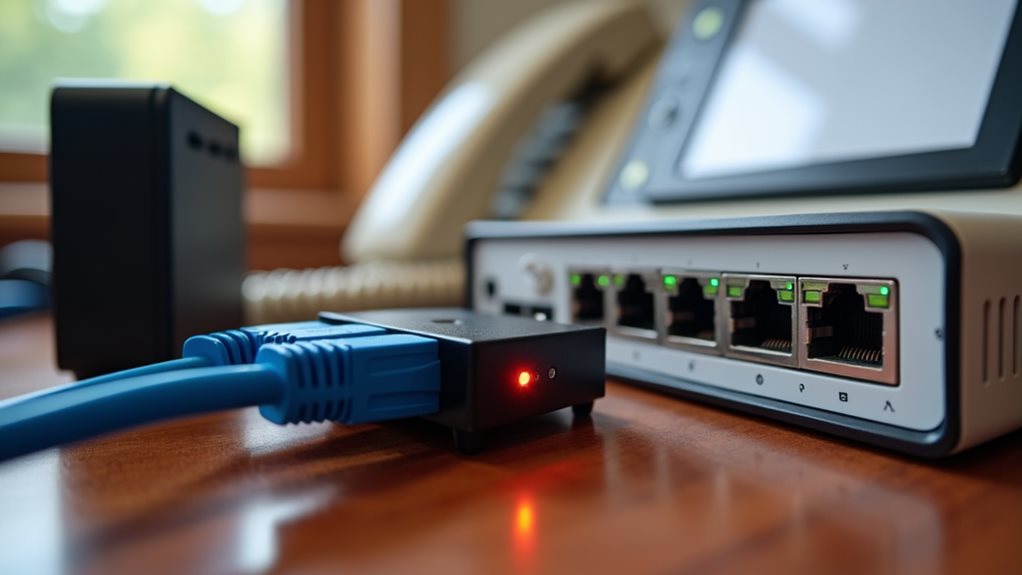
Physical Connections and Ports
Setting up an Analog Telephone Adapter (ATA) requires proper connections to both your router and telephone equipment. Understanding the essential port types and making correct ATA connections will guarantee your VoIP-to-landline conversion works seamlessly.
You'll need to connect your router to the ATA's RJ45 port using an Ethernet cable, and your telephone equipment to the RJ11 port.
To make your setup process smoother, follow these key steps:
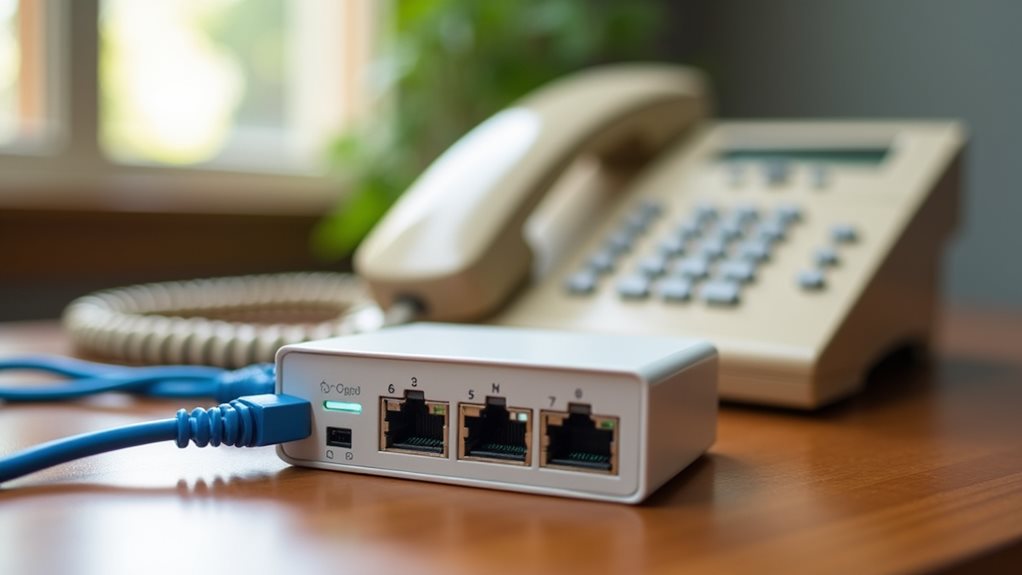
- Connect the Ethernet cable from your router to the ATA's RJ45 port
- Plug your house phone line into the ATA's RJ11 port
- Install a new RJ11 phone jack near your router if needed
- Verify all connections using standard telephone wiring color codes
Your ATA's port configuration might include both FXS ports for analog phones and FXO ports for connecting to traditional phone networks. To ensure high-quality communication, consider using a VoIP router that prioritizes voice traffic.
If you're running short on Ethernet ports, you can use a network switch or powerline adapters to extend your connectivity.
Power and Internet Requirements
Once your physical connections are in place, proper power and internet setup become the next building blocks for a successful VoIP-to-landline conversion.
You'll need a reliable broadband internet connection to guarantee your system functions correctly, and your ATA must be connected to your router through an Ethernet cable for maximum bandwidth optimization.
To maintain power efficiency, you'll want to disconnect your system from the traditional PSTN landline, as this prevents potential damage to your ATA.
Your device typically handles power requirements for one or two phone sets, with a base allowance of 0.3 watts for additional handsets and 2.0 watts for various phone types.
When you're setting up your internet connection, you'll find that VoIP works well with different services, including fiber-optic networks like Verizon's Fios.
Remember that your ATA will automatically establish internet connectivity when the WAN port connects to your router.
The system uses Session Initiation Protocol (SIP) to transmit data packets securely over your internet connection, guaranteeing reliable communication while maintaining energy efficiency during periods of low usage. Additionally, incorporating encryption methods can further secure your VoIP calls against cyber threats.
Initial Configuration Steps
Success in VoIP setup begins with proper ATA configuration and basic pre-setup requirements. Before diving into the VoIP advantages, you'll need to guarantee your system is ready for the shift. Here's what you'll need to accomplish:
- Disconnect your existing PSTN service completely, removing any external telephone provider connections.
- Verify your internet connection meets minimum requirements (100kbps up/down per call).
- Test your network for speed, jitter, and packet loss.
- Acquire a compatible ATA device for seamless conversion.
Once you've completed these preliminary steps, you're ready to maximize your ATA functionality. Connect your ATA to the telephone circuit using an RJ-11 connector, and link it to your router with an Ethernet cable.
You'll then need to configure the settings for both PHONE1 and PHONE2 ports on your ATA device. It's also crucial to have a reliable internet connection, as maintaining call quality greatly depends on it.
After setting up your VoIP devices according to manufacturer specifications, verify the conversion by testing call quality and checking for a consistent dial tone.
Don't forget to fine-tune your settings for peak performance, guaranteeing features like voicemail and call forwarding are working correctly.
Connecting to Broadband Internet
A reliable broadband internet connection forms the foundation of any VoIP-to-landline conversion.
You'll need to evaluate your broadband options carefully, ensuring you select a connection type that delivers consistent performance for your needs. Whether you choose DSL, fiber-optic, cable, or satellite, connection stability is vital for maintaining clear voice quality.
To determine your bandwidth requirements, calculate 115Kbps for each VoIP line you'll be using, then add 15% for network overhead.
You'll want to keep your total usage below 80% of your connection's capacity to prevent call quality issues. For example, if you're planning to use three VoIP lines, you'll need at least 397Kbps (0.397Mbps) of dedicated bandwidth.
Your broadband setup should include a router capable of handling VoIP traffic.
Connect your VoIP adapter or IP phone directly to the router using an Ethernet cable for maximum performance. If you're in a remote area where traditional broadband isn't available, satellite internet can work, though you'll need to account for potential latency issues.
Implementing proper network configuration is key to ensuring optimal VoIP performance.
Testing Phone Connectivity
Testing your phone connectivity starts with running thorough VoIP quality checks before making the final conversion.
You'll need to verify that your network can handle VoIP calls effectively, guaranteeing a smooth shift from digital to analog signals through your ATA device.
To confirm successful VoIP testing and landline verification, follow these essential steps:
- Confirm your internet connection meets the minimum requirements of 100kbps upload and download speeds per call.
- Run VoIP speed tests to measure bandwidth, jitter, and latency levels.
- Check for packet loss using specialized testing tools and document the results.
- Verify proper PSTN disconnection before connecting your ATA to prevent equipment damage.
Once you've completed these preliminary tests, connect your ATA to the modular jack using an RJ-11 connector.
Listen for a dial tone on your phone to confirm successful conversion. It's important to keep in mind that effective management of jitter, latency, and packet loss is essential for maintaining high call quality.
Remember, you're joining countless others who've made this shift successfully – proper testing guarantees you'll maintain crystal-clear communication quality.
If you encounter any issues during testing, don't hesitate to contact your ISP, as they can help optimize your connection for VoIP performance.
Common Troubleshooting Steps
When you're experiencing poor audio quality with your VoIP system, you'll want to check your headset connections and verify that packet loss isn't causing choppy sound.
For network-related issues, start by restarting your router, ensuring proper cable connections, and confirming that your Quality of Service settings prioritize VoIP traffic.
You can often resolve most common VoIP problems by systematically testing each component, from checking basic volume settings to examining your bandwidth capacity for handling voice calls.
Audio Quality Fixes
Poor audio quality can quickly derail your VoIP experience, but most issues have straightforward solutions. When you're dealing with call quality problems, it's important to understand that factors like VoIP codecs and echo cancellation play vital roles in maintaining clear communications.
To improve your audio quality, start with these fundamental steps:
- Check your physical connections, ensuring headsets and handsets are properly connected and free from damage.
- Enable QoS settings on your router to prioritize voice traffic over regular data.
- Test your network speed regularly to confirm you've got sufficient bandwidth.
- Monitor and adjust your jitter buffer settings to reduce audio delays.
If you're still experiencing issues, don't hesitate to dig deeper into your network configuration. Start by disabling SIP ALG on your router, which can often interfere with call quality.
You'll also want to segment your VoIP traffic onto a separate VLAN to protect it from competing network demands.
Remember that consistent maintenance, including regular firmware updates and network monitoring, helps prevent audio quality issues before they impact your communications.
Network Connection Solutions
Network connectivity stands at the heart of successful VoIP to landline conversion. When you're facing connectivity challenges, start with basic network optimization steps that'll get your system running smoothly.
Begin by power-cycling your modem and router, giving them a full 30 seconds to reset, and confirm all physical connections are secure and properly configured.
You'll want to focus on your router's settings next. Disable SIP ALG features, which can interfere with VoIP traffic, and adjust your QoS settings to prioritize voice communications.
If you're using Wi-Fi, position your router centrally to minimize signal interference. For persistent issues, verify your network configuration parameters, including SIP server status and transport protocols.
Don't forget to check your DHCP and DNS functionality, as these are vital for proper VoIP operation. Consider upgrading to a dual-band router if you're experiencing consistent performance issues.
You might also need to allocate dedicated bandwidth for your VoIP devices to guarantee crystal-clear communications. Remember to test your internet speed regularly – a stable, high-speed connection is essential for maintaining reliable VoIP to landline conversions.
Network Configuration Best Practices
Before diving into VoIP-to-landline conversion, proper network configuration serves as the foundation for a reliable phone system. When you understand VoIP advantages and PSTN limitations, you'll be better equipped to set up your network correctly.
Let's explore the essential steps you'll need to follow.
- Start by disconnecting from your existing PSTN service and make certain you've got a stable broadband connection that'll support your VoIP needs.
- Connect your Analog Telephone Adapter (ATA) to your network using high-quality Category 5e or 6 Ethernet cables.
- Configure your SIP settings with the credentials provided by your VoIP provider.
- Test your setup by verifying dial tones and making test calls.
You'll want to pay special attention to your device configuration and network integration.
Make sure you're using the right equipment, including RJ-11 connectors and modular jacks, to connect your ATA to your internal phone circuits.
Don't forget to use telephone line splitters if you're setting up multiple lines.
Once you've completed the configuration, run through post-setup checks to make certain everything's working properly.
If you encounter any issues, your VoIP provider's support team is there to help.
Security and Safety Considerations
Three critical security concerns must be addressed when converting VoIP to landline systems. You'll need to protect against both VoIP security threats and traditional landline vulnerabilities while ensuring your data remains encrypted during transmission. Understanding these risks will help you implement the right protective measures for your communication system.
To safeguard your conversations, you'll want to partner with a VoIP provider that offers robust security features. Look for services that provide end-to-end encryption, multi-factor authentication, and regular security updates. Your provider should also maintain strong protocols against data breaches and unauthorized access attempts.
On your end, it's crucial to implement proper network segmentation and monitoring. You should configure your firewall to protect VoIP traffic specifically, use intrusion detection systems, and regularly update all security protocols.
Don't forget to encrypt both your signaling and media traffic using TLS and SRTP protocols. By following these security measures, you'll create a reliable defense against potential threats while maintaining clear communication between your VoIP and landline systems.
Remember to regularly review and update your security practices to stay ahead of emerging threats.
Future-Proofing Your Phone Setup
Making your phone system future-proof requires careful consideration of both current and emerging technologies. When you're integrating VoIP advantages with existing analog infrastructure, you'll want to guarantee your setup remains versatile and adaptable for years to come.
To maximize your system's longevity and effectiveness, consider these essential elements:
- Implement SIP trunking to seamlessly blend your analog phone system with modern VoIP solutions.
- Utilize softphones for enhanced mobility and flexibility across your organization.
- Take advantage of CRM integration capabilities to streamline your communication workflow.
- Incorporate advanced features like video calling and custom dial plans.
You'll find that VoIP technology offers significant advantages over traditional landline systems, particularly regarding scalability and feature accessibility.
By choosing a software-based VoIP solution, you're positioning yourself to adapt quickly to new communication trends while maintaining analog integration where necessary. The minimal hardware requirements of VoIP systems mean you'll spend less on maintenance and updates, while gaining access to powerful features like instant messaging and automated call routing.
Frequently Asked Questions
Can I Keep My Existing Phone Number When Converting to Voip?
Yes, you can keep your existing number! Most VoIP providers offer number portability options, allowing you to transfer your current phone number. Just make sure to verify your chosen VoIP provider's specific porting requirements beforehand.
What Happens to My Emergency 911 Service After Converting to Voip?
Your 911 call reliability will depend on your internet connection when using VoIP emergency features. You'll need to register your location accurately and understand that service might not work during power or internet outages.
How Much Does Monthly Voip Service Typically Cost Compared to Landline?
You'll typically save 40-60% with VoIP pricing, paying just $15-35 per user monthly, compared to traditional landline costs of $30-48. Plus, you'll join many others enjoying inclusive long-distance calling benefits.
Will Voip Work During Power Outages Like Traditional Landlines Do?
No, your VoIP won't work during power outages like traditional landlines. However, you can maintain service with power backup solutions like UPS systems or mobile apps, addressing common VoIP reliability concerns most users share.
Can I Connect Multiple Phones Throughout My House With Voip?
Yes, you can connect multiple phones in your home with VoIP setup! Use a cordless phone system or configure your home networking to distribute calls. Most providers let you add several handsets throughout your house.
Final Thoughts
Converting VoIP to landline doesn't have to be complicated if you've followed the steps carefully. You'll find that your ATA setup, when properly configured with your internet connection and phone circuit, provides a reliable communication solution. Remember to regularly update your security settings and monitor your network performance to maintain ideal service. If you're experiencing issues, don't hesitate to revisit the troubleshooting steps or consult your service provider.