
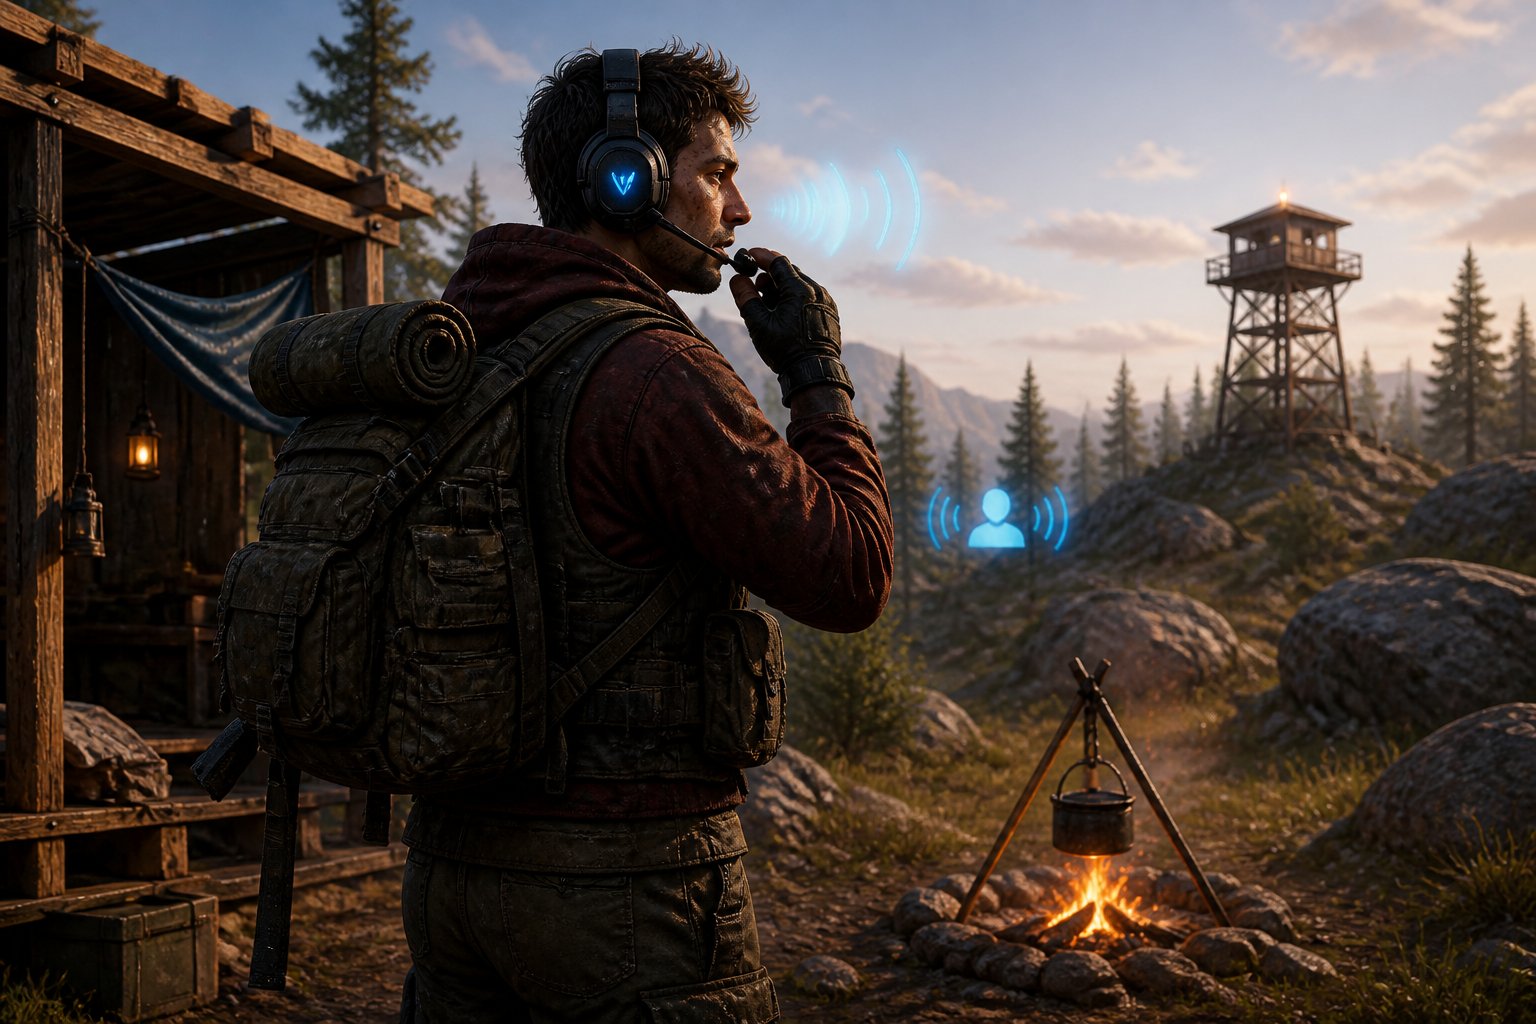
Voice chat in Rust can make the difference between forming alliances or getting shot on sight. To use voice chat in Rust, press and hold the V key to talk to nearby players, which allows you to communicate with anyone within hearing distance of your character. This simple feature becomes one of your most valuable tools for negotiating trades, warning teammates about threats, or even talking your way out of dangerous situations.
Getting your microphone working properly requires more than just knowing which key to press. You need to configure your audio settings correctly, ensure Rust has permission to access your microphone, and understand how the voice chat system works in the game. Many players run into problems with their mic not transmitting or their voice chat not functioning at all.
This guide walks you through everything from basic setup to advanced troubleshooting. You’ll learn how to adjust your settings for the clearest audio quality, fix common problems that prevent voice chat from working, and discover tips that help you communicate more effectively with other players.
Understanding Rust’s In-Game Voice System
Rust uses a proximity-based voice system that connects you to a voice server, allowing real-time communication with nearby players through push-to-talk controls.
Proximity-Based Communication
The voice chat in Rust works on a distance-based system. You can only hear other players who are close to you in the game world. This means your conversations stay local and realistic.
The proximity range is limited to a few dozen meters. Players standing right next to you will sound clear and loud. As they move farther away, their voices become quieter until they fade out completely.
This system creates natural interactions. You cannot talk to someone across the map unless you use other tools. The proximity audio helps teams communicate while preventing enemies from coordinating from far distances.
You need to be aware that enemies nearby can hear everything you say. Planning raids or discussing base locations out loud can give away your position and plans.
Default Push-to-Talk Setup
The voice transmit button is set to V by default when you first install Rust. You press and hold this key to talk through your microphone.
You can change the voice chat button through the game settings. Open the Options menu by pressing Escape, then go to the Keybindings section. Look for the Communication category where you will find Voice Transmit.
The push-to-talk setup prevents background noise from broadcasting constantly. You control exactly when other players can hear you. Some players prefer to rebind the key to something more comfortable, like a mouse button or a key near WASD.
Role of the Voice Server
The voice server handles all audio data between players in Rust. It processes your microphone input and sends it to nearby players in real time.
When the voice server has problems, you might experience voice chat delays or complete failures. The server manages who can hear you based on your location coordinates in the game world.
Your connection to the voice server depends on your internet stability and the game server’s performance. Poor connections can cause choppy audio or make voices cut out. The voice server runs alongside the main game server to keep communication smooth during gameplay.
Configuring Your Voice Input Device
Getting your microphone set up correctly ensures other players can hear you clearly in Rust voice chat. You need to select the right device, adjust volume levels, and fix any conflicts between multiple audio inputs.
Selecting the Correct Microphone
You need to configure your voice input device through Steam’s settings before Rust can use it. Click Friends & Chat in the bottom right corner of Steam, then click the gear icon to open settings. Navigate to the Voice tab where you can select your microphone as the input device.
Steam provides a Test Microphone button that lets you verify your device is working. Speak into your microphone and watch for the input meter to move. If you see activity on the meter, your device is connected properly.
Make sure you choose your actual microphone from the dropdown list. Some PCs have multiple recording devices listed, including virtual cables and disabled hardware. Pick the device that matches your physical headset or standalone microphone.
Adjusting Input Volume and Settings
Your input volume controls how loud your voice sounds to other players. Steam’s voice settings include a volume slider that you can adjust while using the test feature. Speak at your normal gaming volume and watch the meter to ensure it reaches the green zone without hitting red.
Windows also has its own input level controls. Open the Control Panel, go to Hardware and Sound, then Sound, and click the Recording tab. Right-click your microphone and select Properties to access the levels tab where you can boost or reduce sensitivity.
Set your levels so your voice registers clearly without background noise triggering the input. Most players find success keeping the meter between 50-80% during normal speech.
Managing Device Conflicts
Having multiple recording devices enabled can cause Rust voice chat to malfunction. You should disable all input devices except the one you’re actively using. Open the Recording tab in Windows Sound settings and right-click any unused devices, then select Disable.
Virtual audio cables and voice changing software create additional input devices that can interfere with your setup. If you use these tools, you need to set them as your default device in both Windows and Steam.
Check your physical connections if Windows isn’t detecting your microphone. Plug your headset directly into your motherboard’s audio ports rather than front panel jacks, which can have weaker connections. Try different USB ports if you’re using a USB microphone.
Customizing Audio and Chat Preferences
You can adjust your voice chat settings in Rust to match your playstyle and hardware setup. The game lets you change keybindings, toggle voice features on or off, and control volume levels for better communication.
Changing Keybindings for Push-to-Talk
You need to access the options menu to change your voice chat key. Press the escape key and select options, then navigate to the audio settings tab.
Look for the voice chat keybind section. The default push-to-talk key is usually V, but you can assign any key that feels comfortable for you. Click on the current keybind and press your preferred key to replace it.
Enabling voice chat in the options menu is required before you can set up push-to-talk. Choose a key that you can reach easily during combat or while running. Many players pick keys near WASD like C, X, or side mouse buttons.
Enabling and Disabling Voice Features
You can turn voice chat on or off in the audio settings menu. This option controls whether you can transmit voice and hear other players talking nearby.
Toggle the voice chat option to enabled if you want to communicate with other players. When disabled, you won’t hear anyone speaking and your microphone won’t transmit.
You also need to check your Steam voice settings to make sure the correct input device is selected. Open the Steam friends and chat window, click the settings cog icon, and go to the voice tab. Verify that your microphone appears in the input device list and the levels are working.
Setting Up Voice Chat Volume
You can adjust voice chat volume separately from game sounds. Open the audio settings and locate the voice volume slider.
Move the slider left to decrease voice chat volume or right to increase it. This setting only affects how loud other players sound when they speak. It doesn’t change your microphone output level.
If voices are too quiet compared to game sounds, increase the voice volume slider. If voices are too loud or distracting, lower it until you find a comfortable balance. Test the settings by listening to other players in-game and adjusting as needed.
Troubleshooting Common Voice Chat Issues
Voice chat problems in Rust typically stem from incorrect device settings, outdated audio drivers, or performance conflicts. Most issues can be resolved by checking your voice input device configuration, updating system drivers, disabling extra recording devices, or adjusting in-game settings.
Microphone Not Detected
Start by checking your physical connections. Unplug your headset or microphone and plug it back in firmly. Try connecting directly to your motherboard’s audio ports instead of front panel connections, as front panel ports can cause detection issues.
Open your Windows Control Panel and go to Hardware and Sound, then Sound, then the Recording tab. Make sure only one voice input device is enabled and set as default. Disable all other recording devices to prevent conflicts with Rust voice chat.
Check your Steam voice settings by clicking Friends & Chat in the bottom right corner of Steam. Click the gear icon and select Voice. Verify that your correct microphone appears in the voice input device dropdown menu and that the input level bar responds when you speak.
If you use an audio interface, try switching between different input channels as some interfaces require specific input assignments to work with Rust.
Fixing Audio Driver Problems
Outdated or corrupted audio drivers are a common cause of microphone problems. Open Device Manager on Windows and expand the Sound, video and game controllers section. Right-click each audio device and select Update driver.
Choose Search automatically for drivers to let Windows find and install the latest versions. Restart your computer after all driver updates complete.
If your headset has dedicated software like Razer Synapse or Logitech G Hub, check for firmware and software updates within those programs. Manufacturer software often includes important compatibility fixes for Rust voice chat not working.
After updating drivers, verify your microphone works in other applications before testing in Rust. This helps confirm whether the issue is system-wide or game-specific.
Resolving Freezing and Lag During Voice Use
Performance issues during voice chat often happen when your system struggles to process audio alongside gameplay. Lower your in-game graphics settings to reduce CPU and GPU load while using voice communication.
Close background applications that use your microphone or significant system resources. Programs like Discord, OBS, or other voice chat software can conflict with Rust’s built-in voice system.
Check your voice activation threshold in game settings. If it’s set too low, your microphone picks up background noise constantly, causing stuttering. Adjust the sensitivity slider until it only activates when you speak clearly.
Network latency can also cause voice chat delays. Use a wired ethernet connection instead of WiFi when possible. High ping or packet loss makes voice transmission choppy and delayed.
Testing with Built-In Console Commands
Rust includes console commands to diagnose voice chat problems. Press F1 to open the console while in-game. Type voice.loopback true and press Enter to hear your own microphone output through your speakers.
If you hear yourself clearly, your microphone works correctly with Rust. Type voice.loopback false to disable the test. If you hear nothing, the game isn’t receiving your microphone input.
Use audio.voices to see a list of players currently transmitting voice. This helps verify whether the problem affects only your outgoing audio or if you can’t hear others either.
Check your Steam voice settings and devices one more time if console tests fail. The issue likely exists in your system configuration rather than the game itself.
Using Third-Party Tools and Enhancements
You can improve your Rust voice chat experience by adding voice changers and virtual microphone software to your setup. These tools let you modify how you sound in-game and give you better control over your audio settings.
Setting Up Voice Changers
Voicemod works with Rust to change your voice in real-time during gameplay. You need to have Voicemod open and properly configured before launching Rust.
First, open your Control Panel and go to Sound settings. Click on the Recording tab and set Voicemod Virtual Microphone as your default input device.
Next, open Steam and access the Friends and Chat window. Navigate to Settings and select the VOICE section. Set the Voicemod microphone as your voice input device here.
Important: Don’t use the Voicemod Virtual Audio device as your output or headphones. The software needs this internally as an audio bridge to process your voice correctly.
Once you complete these steps, you can start Rust and your modified voice will work through the game’s voice chat system.
Integrating Virtual Microphones
Virtual microphones act as intermediary devices between your physical microphone and Rust. They process your audio before sending it to the game.
You need to configure your virtual microphone at the system level first. Go to your Windows Sound settings and select your virtual microphone as the default recording device. This ensures all applications, including Rust, recognize it as your primary audio input.
After setting up the system defaults, you must also configure Steam’s voice settings separately. Open Steam’s settings menu and locate the voice input device option. Select your virtual microphone from the dropdown list.
Your virtual microphone will now capture and process all voice communications in Rust. The game will treat it like a regular microphone but with the added processing capabilities.
Optimizing with Sound Control Panel Tools
Your Windows Sound Control Panel gives you access to microphone properties that affect voice chat quality. Right-click the speaker icon in your taskbar and select Sounds, then go to the Recording tab.
Select your active microphone or virtual device and click Properties. The Levels tab lets you adjust microphone volume and boost settings. Set your microphone level between 70-100 and keep boost minimal to avoid distortion.
The Advanced tab contains sample rate and bit depth settings. Use 24-bit, 48000 Hz (Studio Quality) for the best voice clarity in Rust. Lower settings save bandwidth but reduce audio quality.
In the Enhancements tab, you can enable noise suppression and acoustic echo cancellation. These features help remove background noise and prevent audio feedback during voice chat sessions.
Best Practices for Effective Communication
Using voice chat effectively in Rust requires managing your audio settings, respecting other players, and knowing when to communicate tactical information. Clear communication can mean the difference between surviving an encounter and losing valuable gear.
Respecting Privacy and Muting Players
The built-in proximity voice chat in Rust broadcasts your voice to all nearby players when you press and hold V, including enemies. This means anyone within range can hear your conversations. You should avoid sharing sensitive information like base locations or raid plans through proximity chat.
If you encounter disruptive players, you can mute them individually. Press Tab to open the player list, find the player’s name, and select the mute option. This prevents their voice from coming through your speakers while still allowing you to hear other players.
When using Discord or TeamSpeak for team communication:
- Enable push-to-mute so you don’t accidentally broadcast in-game sounds to your team
- Disable in-game voice output in your Rust settings to prevent audio doubling
- Keep your Discord conversations private to avoid revealing strategies to nearby enemies
Minimizing Background Noise
Background noise disrupts communication and makes it harder for teammates to hear important callouts. Use push-to-talk instead of voice activation to control when your microphone transmits. Configure your microphone sensitivity settings to filter out keyboard clicks, mouse movements, and ambient room sounds.
Position your microphone correctly to capture clear audio. Keep it close to your mouth but not so close that it picks up breathing sounds. Test your audio levels before joining a team to ensure you’re not too loud or too quiet.
Close applications that generate notification sounds while playing. Disable desktop audio alerts and music players that might bleed into your microphone. Your teammates need to hear enemy positions and raid warnings without competing against your background audio.
Leveraging Voice Chat for Strategy
Coordinated teams have a significant advantage over solo players in Rust. Use voice chat to call out enemy positions, resource needs, and tactical changes during raids and defenses. Keep your callouts short and specific. Say “enemy north of our base, two players” instead of vague descriptions.
Assign roles before starting raids or defensive operations. Designate one player to make final tactical decisions and communicate those choices clearly through voice chat. Quick decisions beat perfect decisions made too late.
During base defense, use voice chat to coordinate positions and rotations. Tell teammates which direction you’re covering and when you need to reload or heal. This prevents gaps in your defense and stops raiders from finding weak points.
Frequently Asked Questions
Voice chat problems in Rust often come down to permission settings, hardware configuration, or network restrictions. Most issues can be fixed by adjusting Windows privacy settings, verifying your microphone is set as the default device, or checking that your firewall isn’t blocking voice communication.
How do I enable and configure in-game voice chat on a Rust server?
Voice chat runs automatically on most Rust servers without special setup. Server administrators control whether voice chat is enabled through their server configuration files.
You don’t need to enable voice chat as a player. It works by default when you join a server that has it turned on.
If you want to check your chat visibility settings, open your in-game settings menu and press Options. Make sure the Show Chat setting is turned on to see voice chat indicators.
What client-side settings control microphone input and voice output in Rust?
Your microphone settings are managed through both Windows and Steam. Press Shift and Tab while in-game to open the Steam overlay and click the cogwheel icon.
Go to the Voice tab and select your microphone as the Voice Input Device. This tells Steam which microphone to use for Rust voice chat.
You can change the voice chat button by opening the Options menu and going to the Controls section. The default key is V, but you can reassign it to any key you prefer.
Why can’t other players hear me, and how can I troubleshoot voice chat issues?
The most common reason other players can’t hear you is that Windows hasn’t given Rust permission to use your microphone. Open Windows Settings and go to Privacy, then select Microphone.
Click Change and make sure Microphone access for this device is turned on. You also need to turn on Allow apps to access your microphone and Allow desktop apps to access your microphone.
If permissions are correct, check your sound settings by clicking the speaker icon in your taskbar. Go to the Recording tab and disable any microphones you don’t use, then set your active microphone as the Default device.
Right-click your microphone and select Properties, then go to Levels. Make sure it isn’t muted and increase the volume if needed.
If you see the mic icon appear when pressing V but it doesn’t light up when you talk, your microphone might not be properly configured in Steam. Verify your game files by going to your Steam library, right-clicking Rust, selecting Properties, and clicking Verify integrity of game files under the Local Files tab.
How can I adjust voice chat volume levels and voice range behavior in Rust?
Voice chat volume in Rust changes based on distance from other players. Players closer to you sound louder while those farther away become quieter until you can’t hear them at all.
You can adjust overall game volume through your Windows volume mixer. Right-click the speaker icon in your taskbar and select Open Volume Mixer to change Rust’s volume independently from other applications.
Individual player volume can’t be adjusted separately in Rust. The game uses proximity-based voice chat that automatically handles volume based on distance.
What network, firewall, or NAT settings can prevent voice chat from working properly?
Voice chat in Rust uses your internet connection to transmit audio between players. If your firewall blocks Rust, voice chat won’t work even if your microphone is configured correctly.
Add Rust to your firewall’s allowed applications list. Open Windows Defender Firewall, click Allow an app or feature through Windows Defender Firewall, and make sure Rust is checked for both Private and Public networks.
Some routers with strict NAT settings can block voice communication. Check your router’s NAT type in its settings and consider switching to a more open NAT configuration if you continue having problems.
How can I reduce background noise and improve microphone quality for voice chat in Rust?
Background noise comes through your microphone when it’s set too sensitive or positioned near noise sources. Move your microphone away from fans, keyboards, and other sound-making devices.
Access your microphone properties through Windows sound settings. Click the speaker icon, select Sounds, and go to the Recording tab. Right-click your microphone and choose Properties.
In the Levels tab, lower the Microphone Boost setting if background noise is too loud. A lower boost reduces sensitivity to distant sounds while still capturing your voice.
Update your audio drivers through Windows Update to ensure your microphone works properly. Open Windows Settings, click Windows Update and Security, and install any available audio driver updates.