
When navigating the realm of modern communication, the crossover between VoIP and traditional phone systems can seem daunting. However, by breaking down the process into 10 manageable steps, you can seamlessly bridge the gap between VoIP technology and RJ11 connections.
Each step in this guide serves as a building block towards unlocking the potential of VoIP in your setup. Discover how to effortlessly integrate these systems and elevate your communication game to new heights.
Key Takeaways
- Verify equipment compatibility with RJ11 connections for seamless VoIP integration.
- Ensure proper setup of RJ11 phone jacks and VoIP adapters for efficient connectivity.
- Troubleshoot SIP connectivity and call quality issues to optimize VoIP performance.
- Test connections and call quality to guarantee a smooth VoIP to RJ11 connection experience.
VoIP System Overview
In the world of telecommunications, VoIP revolutionizes voice communication by transmitting audio over the internet using IP technology. When connecting your phone to a VoIP system, the RJ-11 connector plays a crucial role. This connector is a standard in telephone connections and is commonly used for VoIP setups in homes and businesses.
To connect VoIP to an RJ-11, you'll need an Analog Telephone Adapter (ATA). The ATA enables analog devices like traditional phones to work seamlessly with VoIP systems, bridging the gap between modern technology and traditional phone systems. By using an ATA, you can easily connect your existing RJ-11 phone to a VoIP network, allowing you to make and receive calls over the internet.
Understanding how to connect your phone through the RJ-11 connector using an ATA is essential for a successful integration of VoIP into your communication setup.
Check Equipment Compatibility
For a successful integration of VoIP into your communication setup, begin by verifying the compatibility of your equipment with RJ11 connections. Ensure that your VoIP device supports RJ11 connections to seamlessly connect to your existing phones. Check with your VoIP service provider to see if they offer adapters or converters for RJ11 compatibility if needed. It's crucial to confirm that your current phones or devices use RJ11 ports for connection, as this will affect the compatibility with your VoIP system.
Additionally, look out for any specific requirements or recommendations from your VoIP provider regarding RJ11 connections. They may have suggestions on compatible equipment or settings to optimize your VoIP experience. If your devices or phones don't have RJ11 ports, consider purchasing the necessary equipment or accessories to facilitate the connection between your VoIP system and RJ11 devices. By ensuring equipment compatibility, you can set up a smooth and efficient VoIP communication system tailored to your needs.
Locate RJ11 Phone Jack
To locate the RJ11 phone jack in your home or office, examine the wall outlets for a smaller, telephone-specific jack with 6 positions and 4 conductors. RJ11 phone jacks are designed for traditional analog phones and are distinguishable by their size and the number of positions and conductors they have. Typically used for landline phone connections, these jacks are essential for setting up VoIP services.
When searching for the RJ11 phone jack, look for outlets that match this description, ensuring they're suitable for connecting your VoIP device. Understanding the phone wiring in your premises is crucial to identifying the RJ11 jack. If you plan to integrate VoIP with your existing phone system, you may need an Analog Telephone Adapter (ATA) for seamless compatibility.
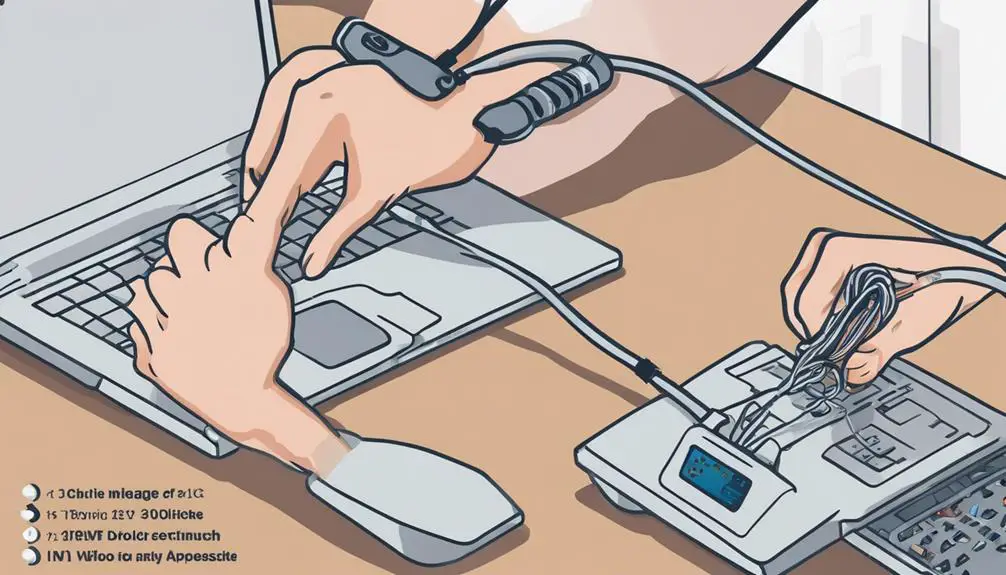
Connect VoIP Adapter
To get started with connecting your VoIP adapter, you need to set it up correctly, establish the RJ11 cable connection, and be prepared with troubleshooting tips in case any issues arise.
Properly configuring the VoIP adapter ensures a smooth transition to digital communication, and using RJ11 cables will help link your analog devices seamlessly.
Voip Adapter Setup
Before connecting your VoIP adapter, ensure that the device is powered on and configured with the necessary settings for seamless integration into your network.
Here are some steps to help you set up your VoIP adapter efficiently:
- Connect the VoIP adapter to your router or modem using an Ethernet cable.
- Use the VoIP adapter to convert analog signals from traditional phones to digital signals for VoIP transmission.
- Connect analog devices like phones, fax machines, or alarm systems to your VoIP network through the adapter.
- Follow the manufacturer's instructions carefully to set up and configure the VoIP adapter for smooth connectivity.
RJ11 Cable Connection
When connecting your VoIP adapter to analog devices like phones and fax machines, utilizing an RJ11 cable is essential for transmitting voice signals effectively over the Internet.
RJ11 cables, also known as phone cables, have 4 or 6 conductors that carry analog signals necessary for voice communication. VoIP adapters typically come equipped with RJ11 ports specifically designed for connecting to analog devices in a VoIP setup.
These cables are the standard choice for telephone connections due to their effectiveness in transmitting voice data.
Troubleshooting Tips
If you're encountering connectivity issues with your VoIP adapter, start by checking the power source and connections to ensure proper functionality. Here are some troubleshooting tips to help you resolve the problem:
- Verify the Ethernet cable connection between the VoIP adapter and the router or modem.
- Restart the VoIP adapter and router if experiencing connectivity issues.
- Ensure the firmware of the VoIP adapter is up to date for optimal performance.
- Contact the VoIP service provider for technical support if troubleshooting steps don't resolve the issue.
Plug in Power Supply
To power up your VoIP device, simply connect the power supply to a standard electrical outlet. Your VoIP phone requires proper power to function and facilitate internet calls effectively. Make sure the power supply is compatible with the voltage requirements of your VoIP device to avoid any electrical issues.
The power supply may be in the form of an AC adapter or a power cord, depending on the specific VoIP phone model you have. Ensuring a secure and correct connection of the power supply is crucial for your VoIP phone to operate seamlessly.
Configure VoIP Settings
When configuring VoIP settings, you'll need to take several steps:
- Set up the SIP server information.
- Choose your preferred codecs.
- Adjust network configurations.
Access the device's web interface via the assigned IP address to make these adjustments.
Don't forget to configure:
- Port forwarding,
- Quality of Service (QoS), and
- Firewall settings for optimal VoIP performance.
VoIP Setup Process
Access the web-based interface of your VoIP device to configure the VoIP settings efficiently. Follow these steps to set up your VoIP system:
- Enter the SIP server information provided by your VoIP service provider for registration.
- Set up the codec preferences for audio compression and quality during VoIP calls.
- Enable features like call waiting, caller ID, and voicemail through the VoIP settings.
- Test the VoIP connection by making a test call to ensure proper configuration.
Network Configuration Tips
Efficiently configure your network settings for optimal VoIP performance by adjusting the RJ11 connection. Ensure your VoIP phone supports RJ11 connections for compatibility. Connect the VoIP device to the phone jack using an RJ11 cable.
Configure the VoIP settings to recognize the RJ11 connection for proper functionality. Verify the signal strength and quality of the RJ11 connection to ensure clear voice transmission. After connecting to the RJ11, test the VoIP system to guarantee seamless communication.
Proper network configuration is essential for maximizing the performance of your VoIP phone and ensuring reliable voice transmission through the RJ11 connection.
Troubleshooting Common Issues
To troubleshoot common issues related to VoIP settings, start by checking the configuration on your device for accuracy. Here are some steps to help you resolve these problems:
- Verify the SIP credentials, server details, and codec settings.
- Ensure that the network settings, such as DNS and gateway, are accurate.
- Troubleshoot audio issues by checking microphone and speaker settings.
- Test the connection by making a call to identify any call quality or connectivity issues.
Test Phone Line Connection
To verify the proper connection of your RJ11 phone line, employ a phone line tester to check for continuity and ensure secure attachment to the RJ11 jack. Testing for a dial tone is crucial to confirm the phone line is correctly connected to the RJ11 jack. Check for any visible damage on the RJ11 connectors that might impede the connection.
| Phone Line Tester | RJ11 Jack | Dial Tone |
|---|---|---|
| Check continuity | Ensure secure fit | Verify |
Using the phone line tester, confirm that there is continuity in the connection. Ensure the RJ11 jack securely holds the connection to prevent any loose connections. Finally, pick up a phone connected to the line and listen for a dial tone to verify the successful connection. If there is no dial tone, troubleshoot by examining the wiring configuration to ensure it aligns with the RJ11 standard.
Troubleshoot Issues
When troubleshooting issues with connecting VoIP to RJ11, first check the RJ11 cable connection from the VoIP device to the analog phone for secure plugging. Ensure that the connection is snug and properly inserted to avoid any loose contacts that may disrupt the signal.
Here are some steps to troubleshoot common problems:
- Verify RJ11 Port Functionality**: Check that the RJ11 port on the VoIP device is working correctly and not physically damaged.
- Test with Another RJ11 Cable: Try using a different RJ11 cable to connect the analog phone to the VoIP device to eliminate any cable-related issues.
- Check Configuration Settings: Inspect the configuration settings on the VoIP device to confirm it's configured to support analog phones via the RJ11 port.
- Contact Service Provider**: If troubleshooting steps don't resolve the problem, reach out to the VoIP service provider for further assistance in connecting VoIP to RJ11.
Following these steps should help in identifying and addressing common connectivity issues between your VoIP device and analog phone through the RJ11 cable.
Ensure Call Quality
Ensure optimal call quality by prioritizing network stability and implementing key settings to enhance audio clarity during VoIP calls. Begin by checking your bandwidth and network stability to guarantee clear call quality.
Utilize Quality of Service (QoS) settings on your router to give priority to VoIP traffic, ensuring better call quality. Implement settings like echo cancellation and jitter buffer to minimize audio issues during calls.
For improved call quality, consider using wired Ethernet connections over Wi-Fi to reduce latency and interference. Regularly monitor and test your VoIP system to promptly identify and address any call quality issues that may arise.
Finalize Setup and Enjoy!
To ensure a successful setup, verify that all connections are correct.
Test the VoIP call quality by making a test call.
If any issues arise, troubleshoot them promptly for seamless communication.
Verify Connections Correctly
Begin by double-checking the secure connection of the RJ11 cable to the appropriate port on your VoIP device. Once you have ensured the physical connection, follow these steps to verify the connections correctly:
- Confirm the RJ11 cable is securely plugged into the correct port on your VoIP device.
- Check that the RJ11 cable is connected to the right phone jack or port on the VoIP adapter.
- Listen for a dial tone on the analog phone connected via the RJ11 cable to validate the setup.
- Ensure that the analog phone can make and receive calls without any issues, indicating a successful connection.
Verifying these connections ensures a smooth experience when using your analog phone in the VoIP system.
Test VoIP Call Quality
Double-checking your VoIP setup by testing call quality is essential for ensuring a seamless communication experience with your analog phone. To evaluate the performance of your VoIP calls, consider using tools like MOS testing to gauge call quality based on user feedback. Measure latency, jitter, and packet loss to optimize VoIP call performance. Conduct test calls to assess audio clarity, echo, and background noise, ensuring a high-quality conversation. Check your network bandwidth to support VoIP traffic adequately, prioritizing it for consistent call quality. Adjust codec settings and network configurations as needed to enhance your VoIP call experience.
| Aspect | Description |
|---|---|
| Audio Clarity | Evaluate the clarity and crispness of the voice during the call. |
| Latency | Measure the delay between the time a sound is spoken and when it is heard. |
| Packet Loss | Assess the percentage of lost packets during the call, impacting call quality. |
Troubleshoot Any Issues
Ensure a seamless VoIP experience by swiftly resolving any setup issues and optimizing for smooth communication. Follow these steps to troubleshoot any problems:
- Verify the Ethernet cable connection from the VoIP phone to the router for proper communication.
- Ensure the VoIP phone is powered on and charged to avoid connectivity issues.
- Restart the router and modem to refresh the network connection for the VoIP setup.
- Update the firmware of the VoIP phone if available to enhance performance and compatibility.
If these steps don't resolve the issues, contact the VoIP service provider for technical support. By addressing these common troubleshooting areas, you can finalize the setup and enjoy uninterrupted VoIP communication.
Can I Use the Same Steps to Connect VoIP to RJ11 to Forward My VoIP Number to a Cell Phone?
Yes, you can use the same steps to forward VoIP number to cell. First, connect VoIP to RJ11 using an adapter. Then, log in to your VoIP account and navigate to the Call Forwarding settings. Finally, input your cell phone number to have calls forwarded to your mobile device.
Frequently Asked Questions
How Do I Connect My Voip to My Landline?
To connect your VoIP to your landline, use an Analog Telephone Adapter (ATA) to bridge the gap. This device connects your landline phones to VoIP service, offering cost savings and additional features.
Does Voip Use Rj11?
Yes, VoIP does not typically use RJ11 connectors due to their analog nature. VoIP relies on digital data transmission, requiring RJ45 connectors for Ethernet connections. To connect VoIP to RJ11, consider hardware requirements, signal transmission, and wiring configurations carefully.
How Do I Port My Landline to Voip?
When switching providers, opt for VoIP as a landline alternative. Ease the transition process by contacting your VoIP service provider to port your number. Enjoy VoIP benefits post-activation, ensuring a seamless shift.
How Do I Connect My Voip Phone to My Analog Line?
In setting up your VoIP, link it to your analog line by connecting an Analog Telephone Adapter to your phone using an RJ11 connector. Ensure compatibility and configure the ATA for seamless integration.
Conclusion
Just as connecting VoIP to RJ11 requires careful steps and attention to detail, navigating through life's challenges requires patience, perseverance, and determination. Embrace the journey, overcome obstacles, and enjoy the rewards of your hard work.
Remember, every connection made, whether in technology or in life, adds value and enriches your experiences. Stay connected, stay strong, and keep moving forward towards your goals.